
Uninstalling privden
What it is / when to use it
Uninstalling removes privden from the computer. You choose whether your messages go with it. Keep them, and installing privden again finds them. Either way, your server name stays reserved to you: install privden again and confirm the same email address, on this computer or another one — see Moving to another computer for what comes with the name.
How to use it
On Windows
- Open Settings → Apps → Installed apps, find privden, and choose Uninstall.
- The uninstaller asks Do you also want to delete all server data? — messages, database and configuration. - Answer No to keep your messages: they stay on the computer. - Answer Yes only if you want every message, account and file gone for good. A final warning asks once more before anything is deleted, and it cannot be undone.
On macOS
- Open the privden menu and choose Uninstall privden….
- The window Uninstall privden? says what is removed: the app, its background server, the account that server runs as, and its login item.
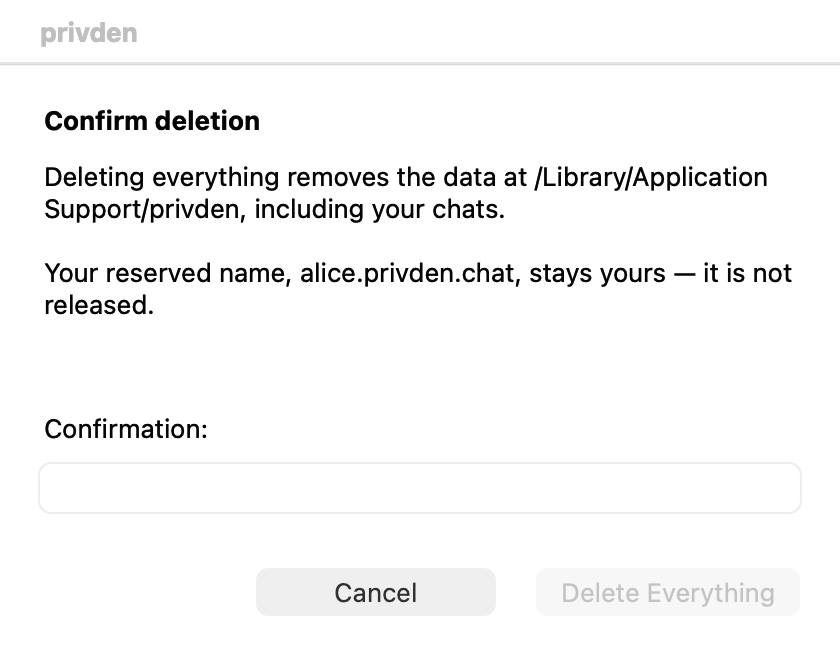
- Choose Keep My Data, or Delete Everything…. To delete everything, privden asks you to confirm by typing your server's name (or
DELETE, if no name was reserved yet), then Delete Everything. - macOS asks for an administrator password once. The window that opens says Install — that is the system installer's own wording; it is privden being removed. Follow it to the end.
If privden could not remove everything cleanly, it lists what is left: try again, or remove those items by hand.
Commands & settings
| Command | How to run |
|---|---|
| Uninstall privden… (macOS) | privden menu → Uninstall privden… |
| Uninstall (Windows) | Windows Settings → Apps → Installed apps → privden → Uninstall |